To start Secure Shell which will allow you to login to the new server, change the default password and upload files for your webpages run the shortcut
“SSH Secure Shell Client” from the desktop or Start menu.
(If
you wish to download it and install it on your home computer you can get it
from
http://www.matcmp.ncc.edu/ssh/SSHSecureShellClient-3.2.9.exe
)
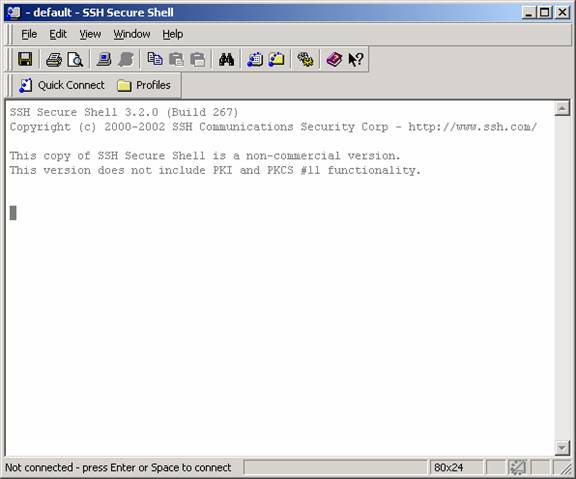
Once
you run it you will see a screen similar to this
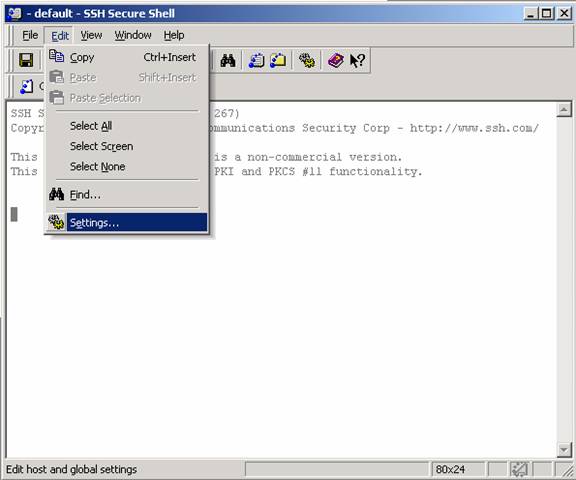
First
thing I recommend is change the default color scheme
(this step is optional and can be skipped). You can do this by going to the
Edit menu, then Settings. I like to use a black background so it looks like a
real Unix terminal.
Once
in Settings, click the Colors option as shown below and change the
Foreground
to White, Background to Black and the Cursor color to White.
As
shown below
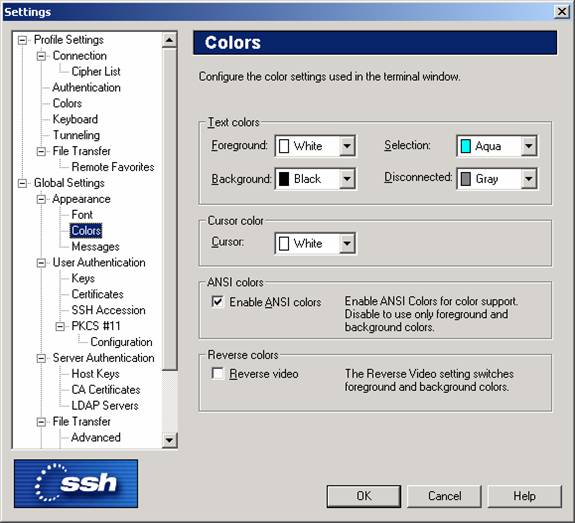
Then
Click OK
You
will want to save these settings, this can be done by going to the File menu
and selecting “Save Settings”
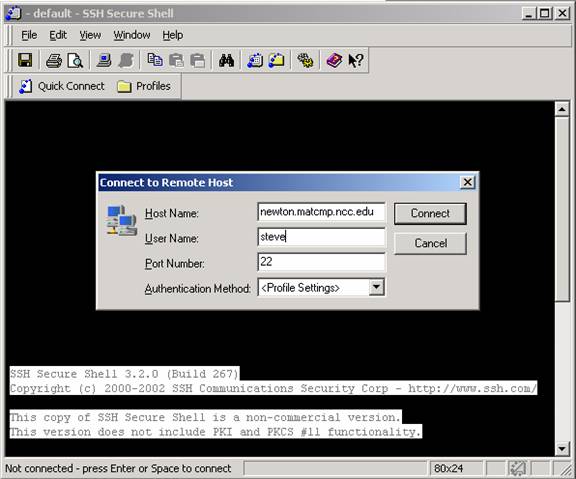
Now
you are ready to connect to the server. Go back to the File menu and select
“Connect…” (or click “Quick Connect” from the toolbar)
This
will bring up the connect dialog, fill in the fields as such.
Host
Name: newton.matcmp.ncc.edu
User
Name: (your username, first 6 letters of your last name followed by your first
name’s initial). For example Claudia Black would have the username blackc.
Leave
the Port Number to 22 and Authentication Method as
“<Profile
Settings>”
Then
click the Connect button
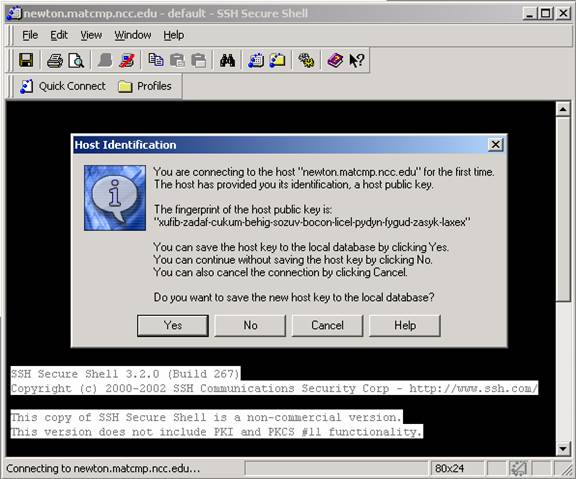
You
will then see a dialog named “Host Identification”,
this is asking you if you want to save the server’s key (which is used to
encrypt your connection)
Answer
Yes
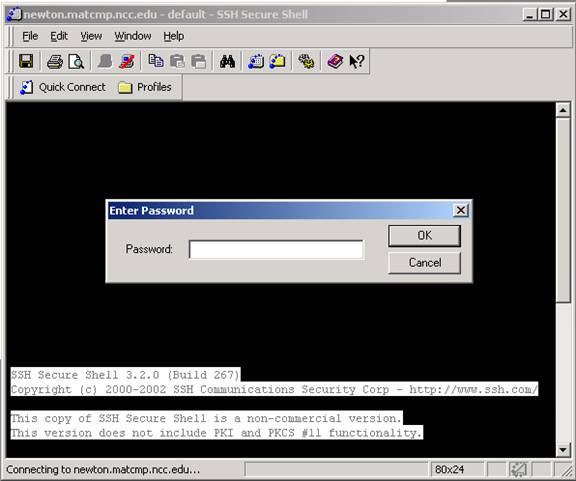
The
server will then ask you for your password.
Unless
told otherwise your initial passwords have been set to the last 4 digits of
your office number (as in the 2002 NCC CAMPUS TELEPHONE DIRECTORY)
If
you are adjunct then your initial password will be 7383
Click
OK after putting in your password and you will be logged into the server.
You
can now change your password by typing the command
passwd
and
pushing Enter.
It
will ask you for your old password then a new password.
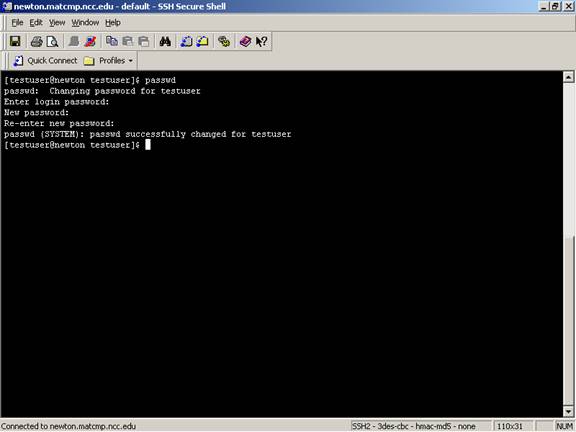
After
this your password will be changed on the webpage/email server (NOT the
@ncc.edu mail, just the local dept. email).
Keep
in mind this doesn’t change your password that you use to login to the Windows
network in the lab or in your office.
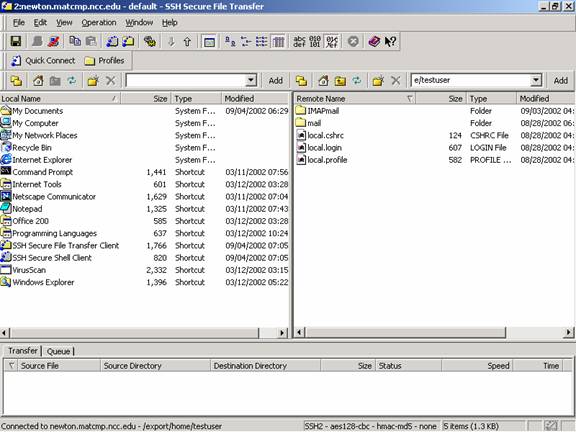
If you
want to transfer files to the server for storage or for your webpages you can do this now by going to the Window menu
then clicking “New File Transfer”
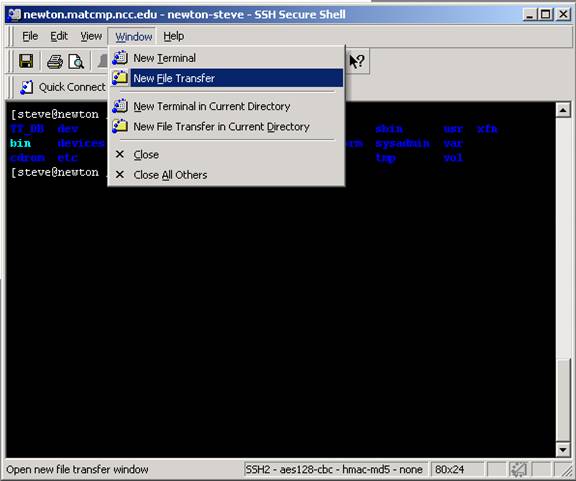
This
will open up a new file transfer window which has a similar look to the WS FTP program
which you might be used to.
The
window pane on the right shows your directory and files on the server and the
window pane on the left shows local files.
To
publish a webpage you need to put all your files in a folder named “public_html” on the server.
To create this folder (if it wasn’t already made for you) right click in the right window pane, select New Folder then give it the name : “public_html”
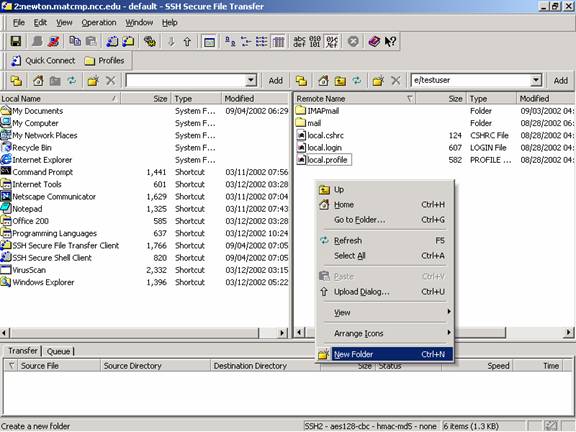
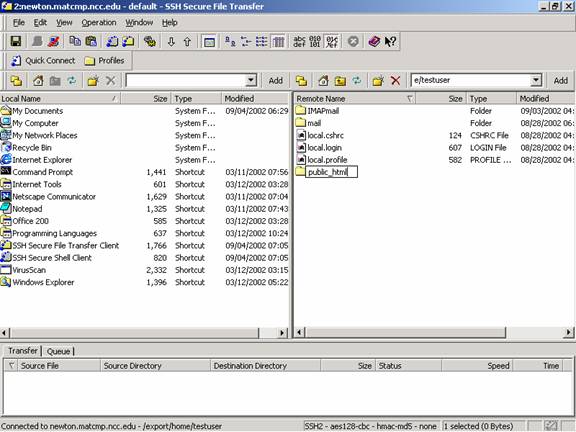
You
can then double click the folder you’ve just made to go into it.
To
transfer files from your computer or j: drive drag and drop the files from the
left window pane to the right one and vice versa
Remember
that your first page/homepage has to be named index.htm or index.html
To
logout of the server you can close the File Transfer window and type
logout
then push enter at the prompt.
The
URL for your webpage, once uploaded, will be
http://www.matcmp.ncc.edu/~username
You can also use
http://matcmp.ncc.edu/~username
Written by Steve Ochani